
Setup & Materials
For this tutorial you'll need Verdant installed in JupyterLab. We'll
use a notebook houses_kc.ipynb and its Verdant history
file houses_kc.ipyhistory. Verdant stores output images,
like plots or charts, in a seperate folder
houses_kc_output. All of these materials can be
downloaded as a zip file tutorial_notebook.zip from the
GitHub repository tutorial folder.
Next unzip the folder on your own machine and start jupyter lab with
jupyter lab .. Open up the notebook in:
tutorial_notebook/houses_king_county/houses_kc.ipynb.
If everything has loaded OK, you should see Verdant's tree log icon at the left. Click the log to open up Verdant. You should see an activity pane like below.
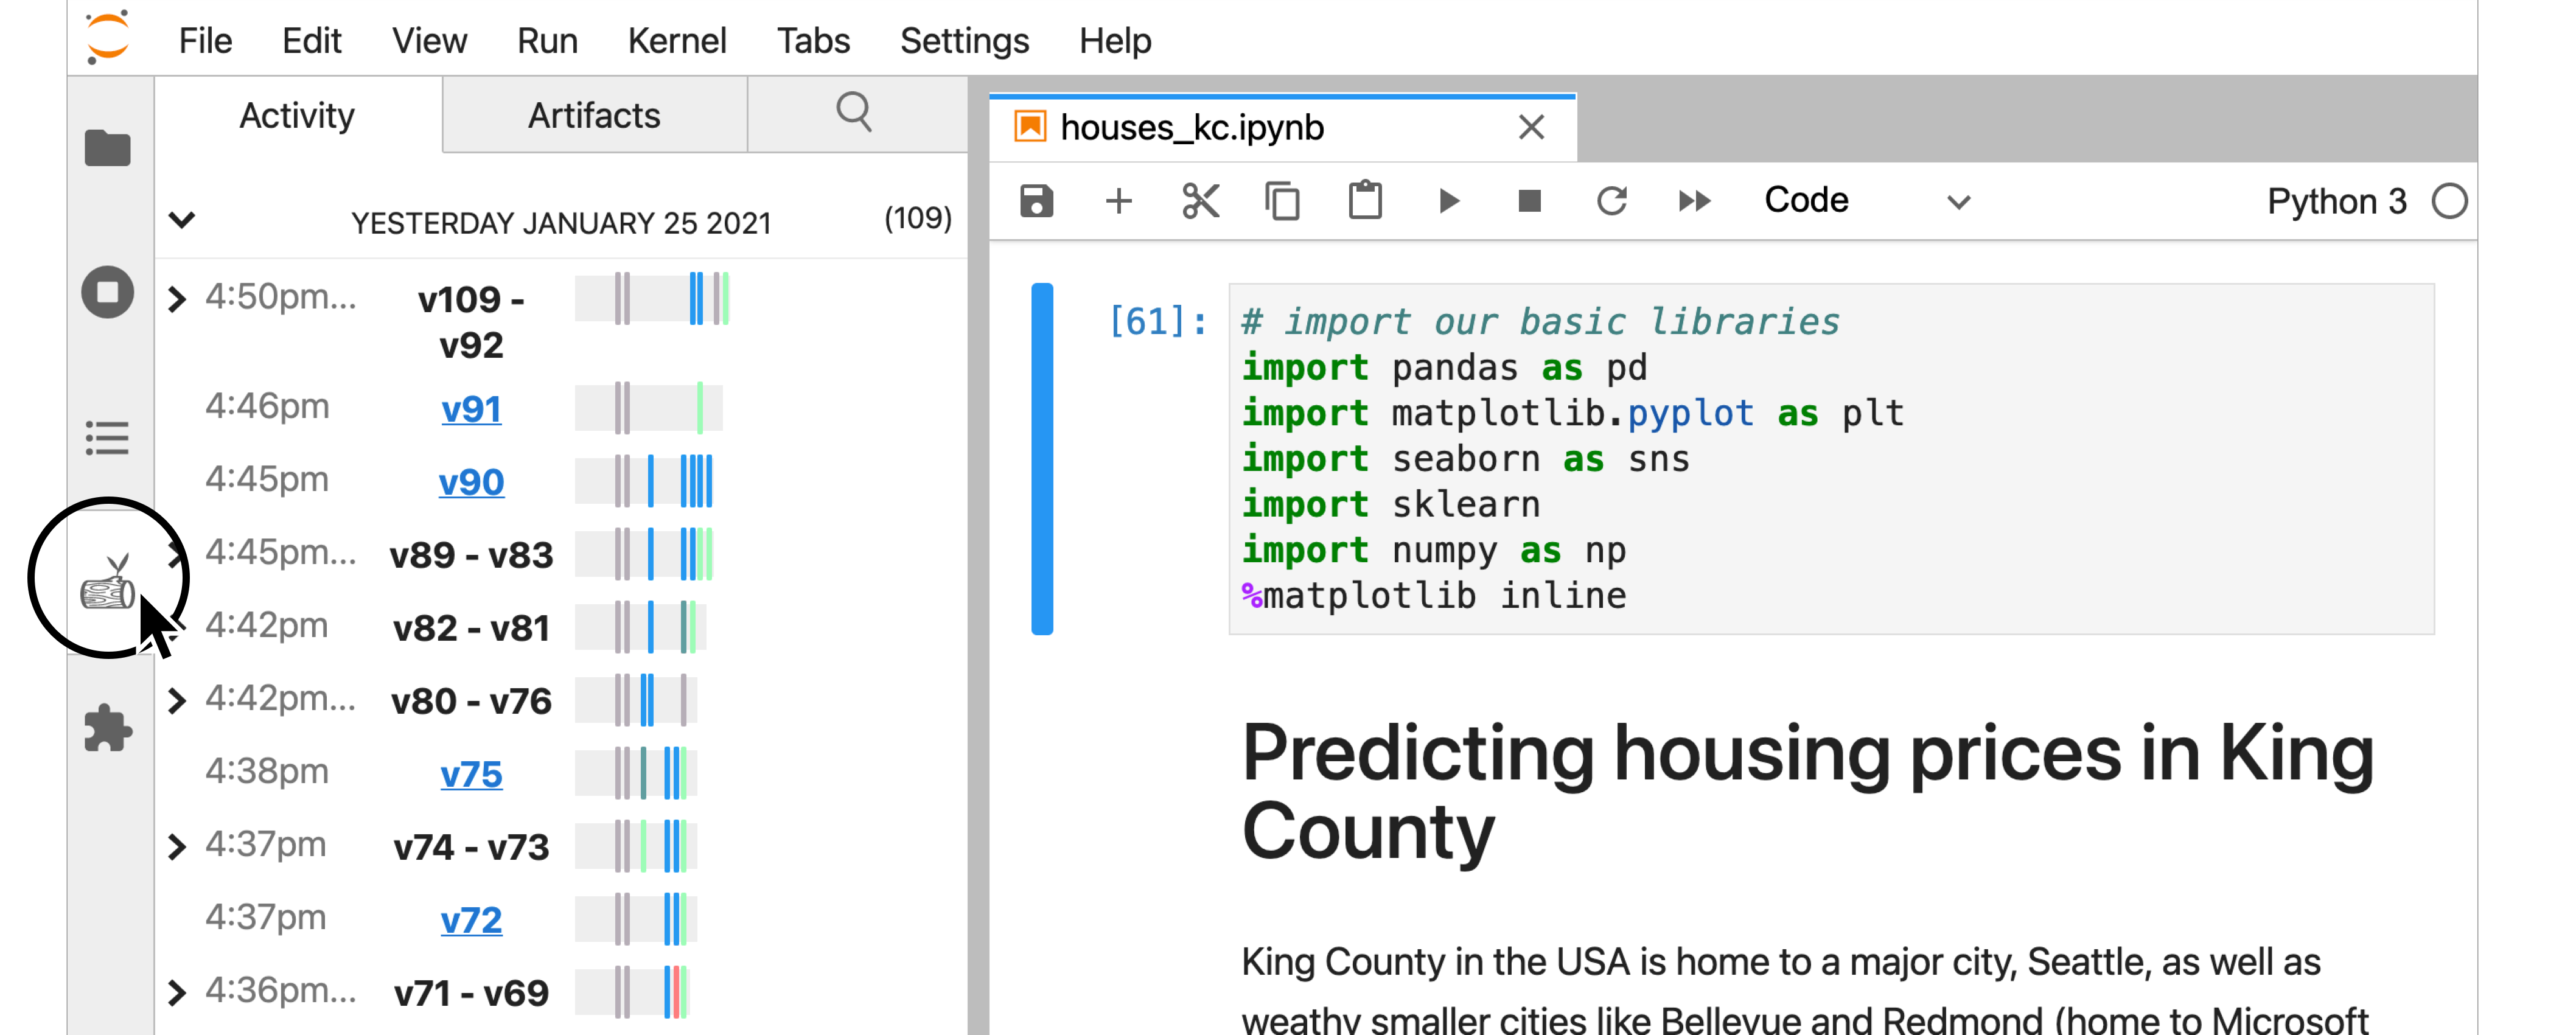
In houses_kc.ipynb the author has been at work predicting
housing prices in the Seattle area of the United States. In this
tutorial, we'll use history to uncover different details of the
analysis and the author's modeling choices.
🌱 In this tutorial, triple-click the black bar with your mouse to reveal the answers to a question. 🌱
Secret revealed. You did it!
1. Get an overview of what has been done so far
The dataset in this analysis has a fair number of features to describe
each property. However, the author of
houses_kc.ipynb seems to have picked just a single
feature sqft_living for their first model:

Did the author explore any of the other features? One good way to get an overview is to take a peek at how this notebook has evolved over time. Using the activity pane (shown below) scroll down to the earliest version of the notebook.
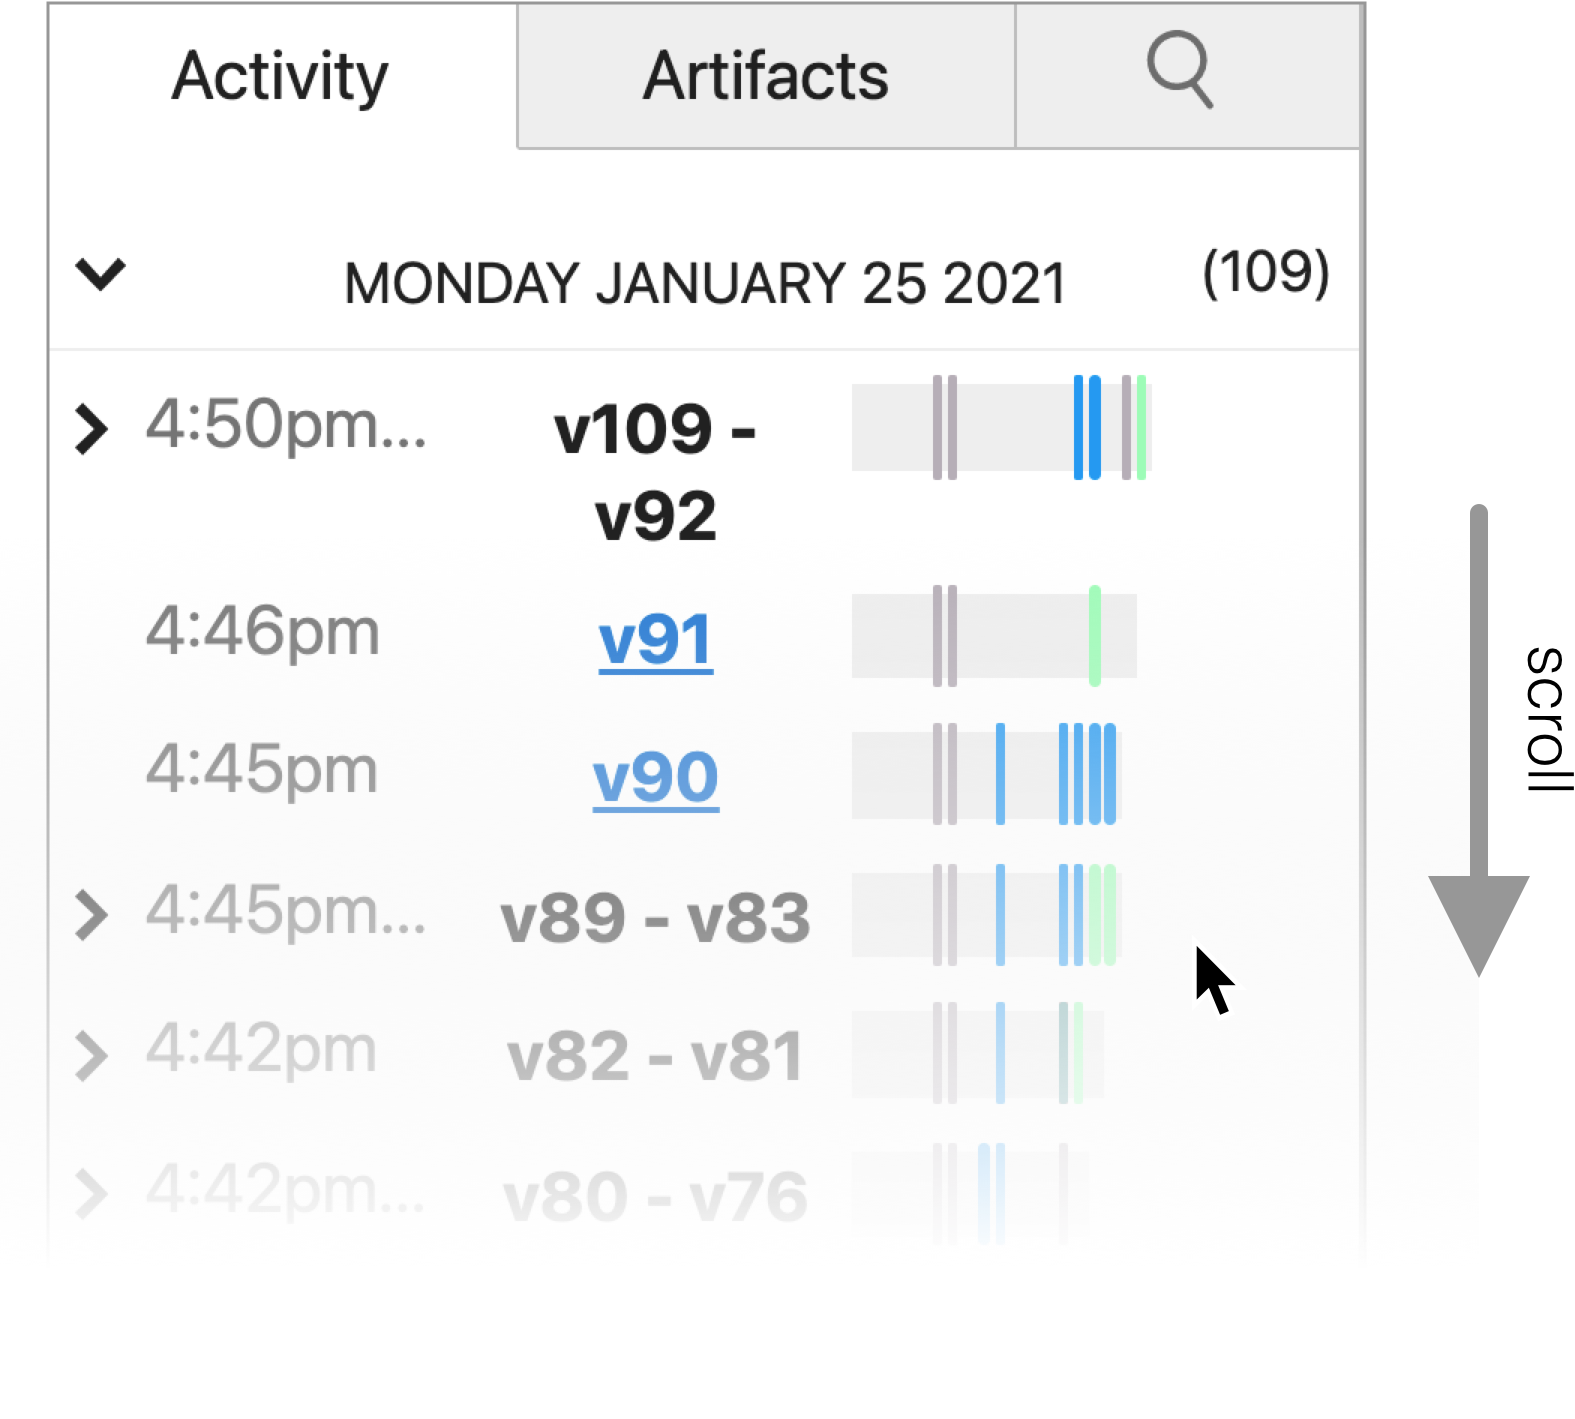
Question: Looking at the earliest version, what date and time did the author first start working on this notebook?
January 25, 2021 at 3:46pm
The notebook minimap with the colorful ticks next to each version row shows us which cells changed in a given notebook version. Green indicates a cell added, red a cell deleted, blue a cell changed, and so on.
Question: Use your mouse to hover over the vertical line tick in the minimap for v39-40. Which cell was changed in v39-v40 and how?
Code cell 9 was edited
Now let's get back to figuring out what the author tried in this analysis. Try clicking on a version v37 (shown below) to open the full notebook at that version as a ghost notebook:
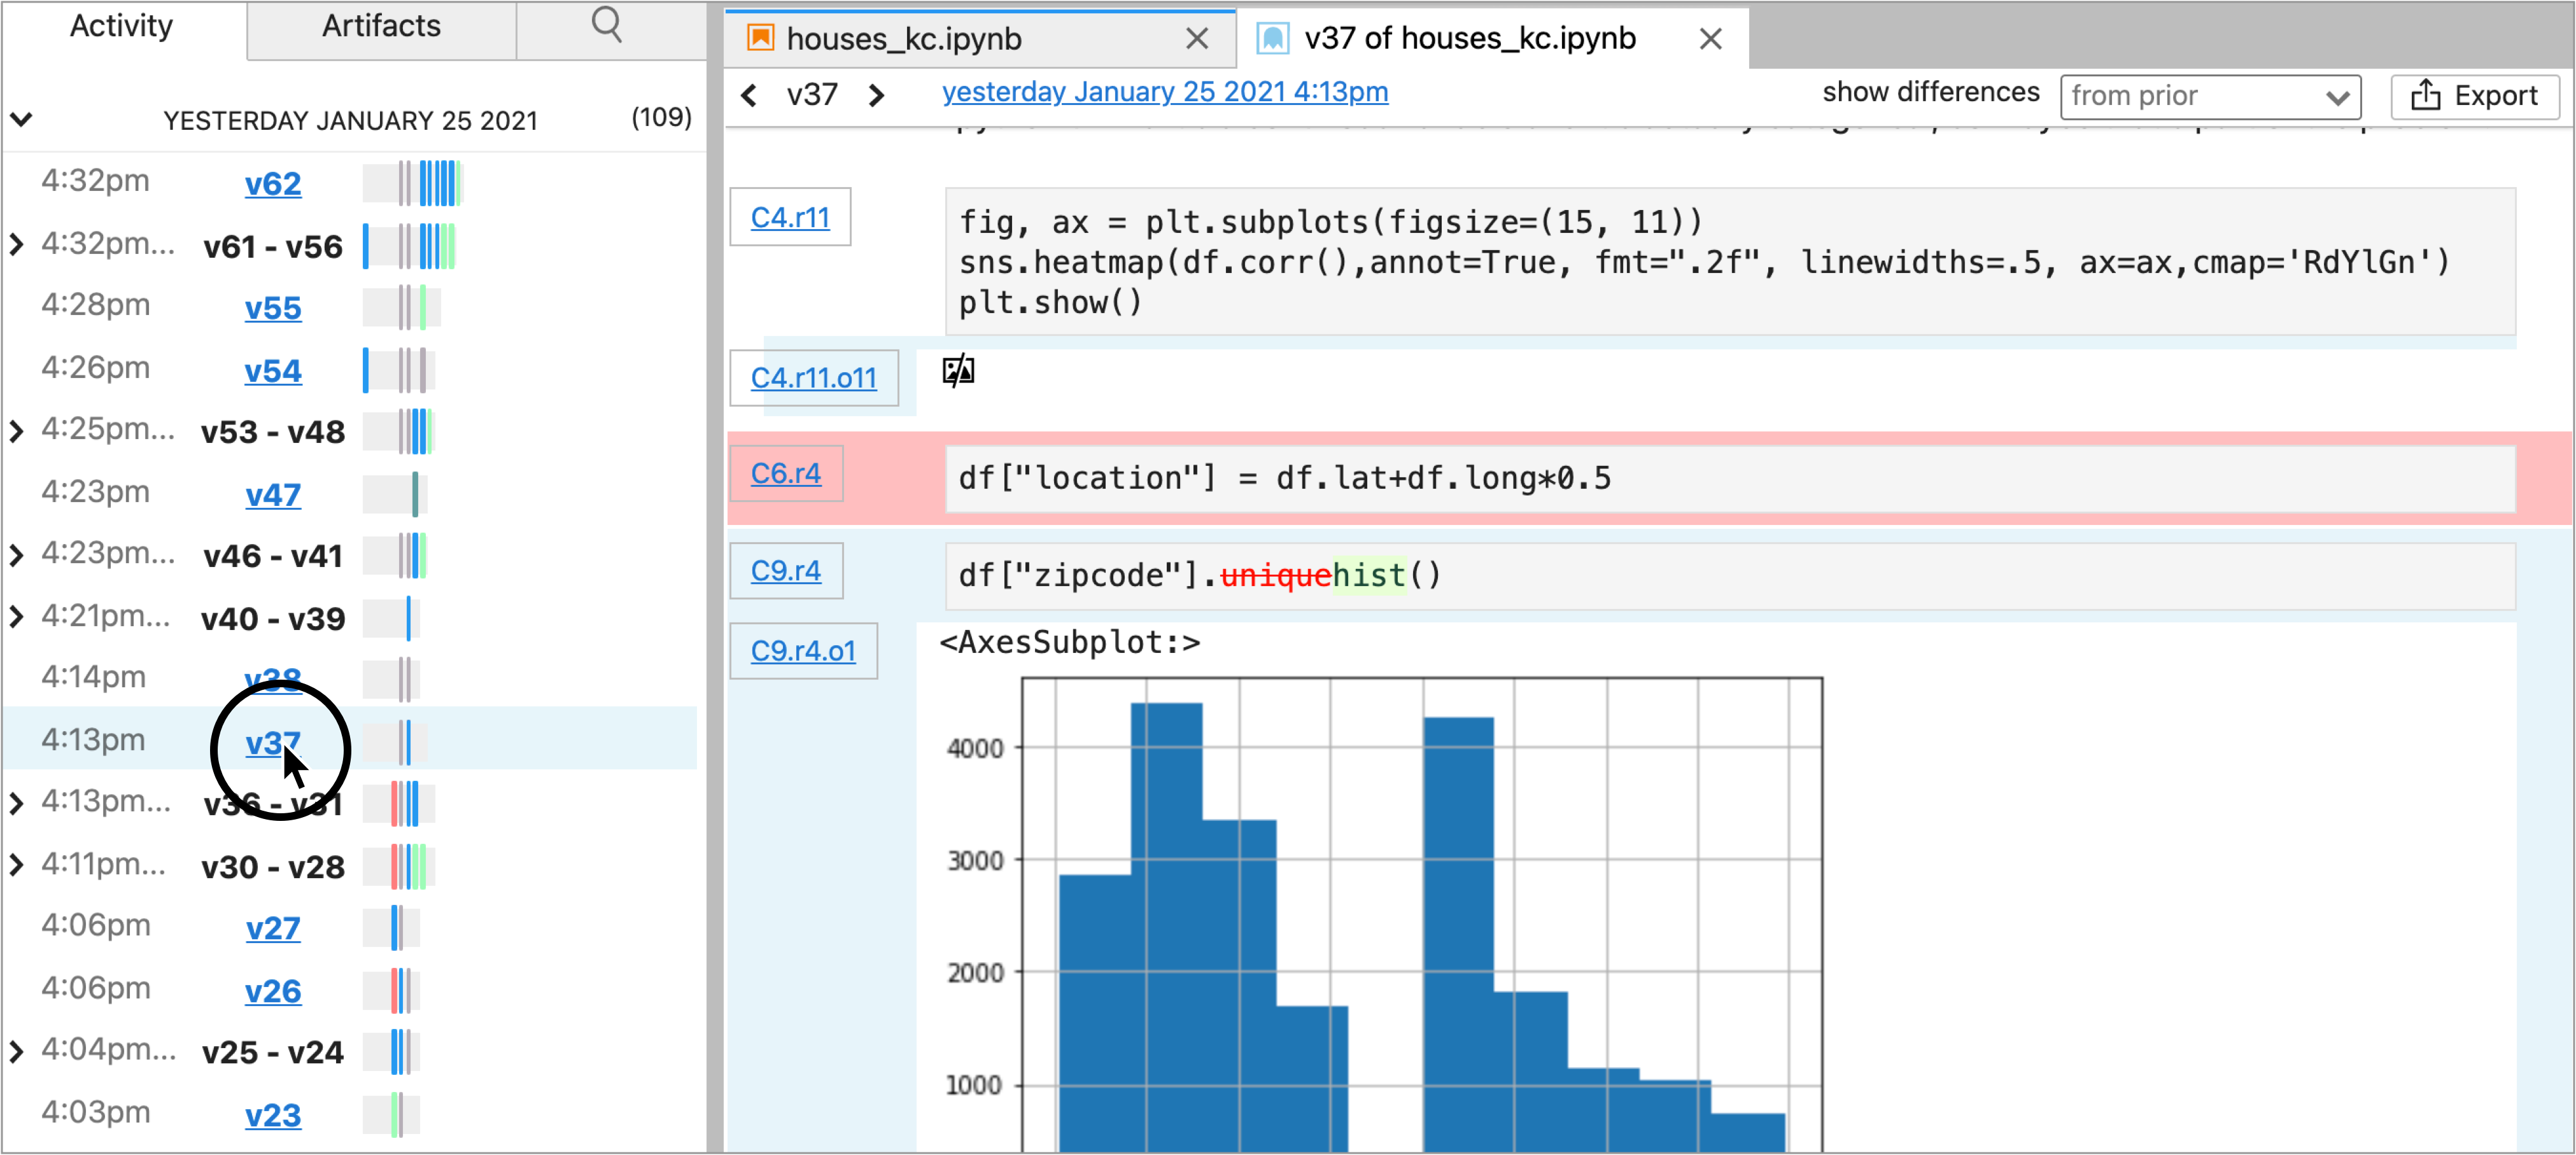
The diff notation in the ghost notebook highlights what content was added (green), deleted (red), or edited (blue) in this version. Next, try using the arrows at the top of the ghost book to move ahead in time a couple of versions, and watch how the notebook changes:

Question: Glance through versions v37 to v50 of the notebook. Other than sqft_living, what are 2 other features the author plotted compared to price?
zipcode, bedrooms, or bathrooms
Hopefully you've spotted a few charts in these versions, however it's a bit tedious to skim one at a time though versions. Next let's learn some strategies to more directly find specific things from history!
2. Track model improvements
For this notebook, it would be helpful to know what kind of model performance the author has gotten so far for predicting house prices. What kind of models have they tried and what were their results?
There are a few ways in Verdant to find specific history. Head over to the Artifacts tab.
The Artifacts tab has two views: a table view summarizing overall history of your current notebook and a detailed history view that will show you all history for one specific artifact (a cell or an output):
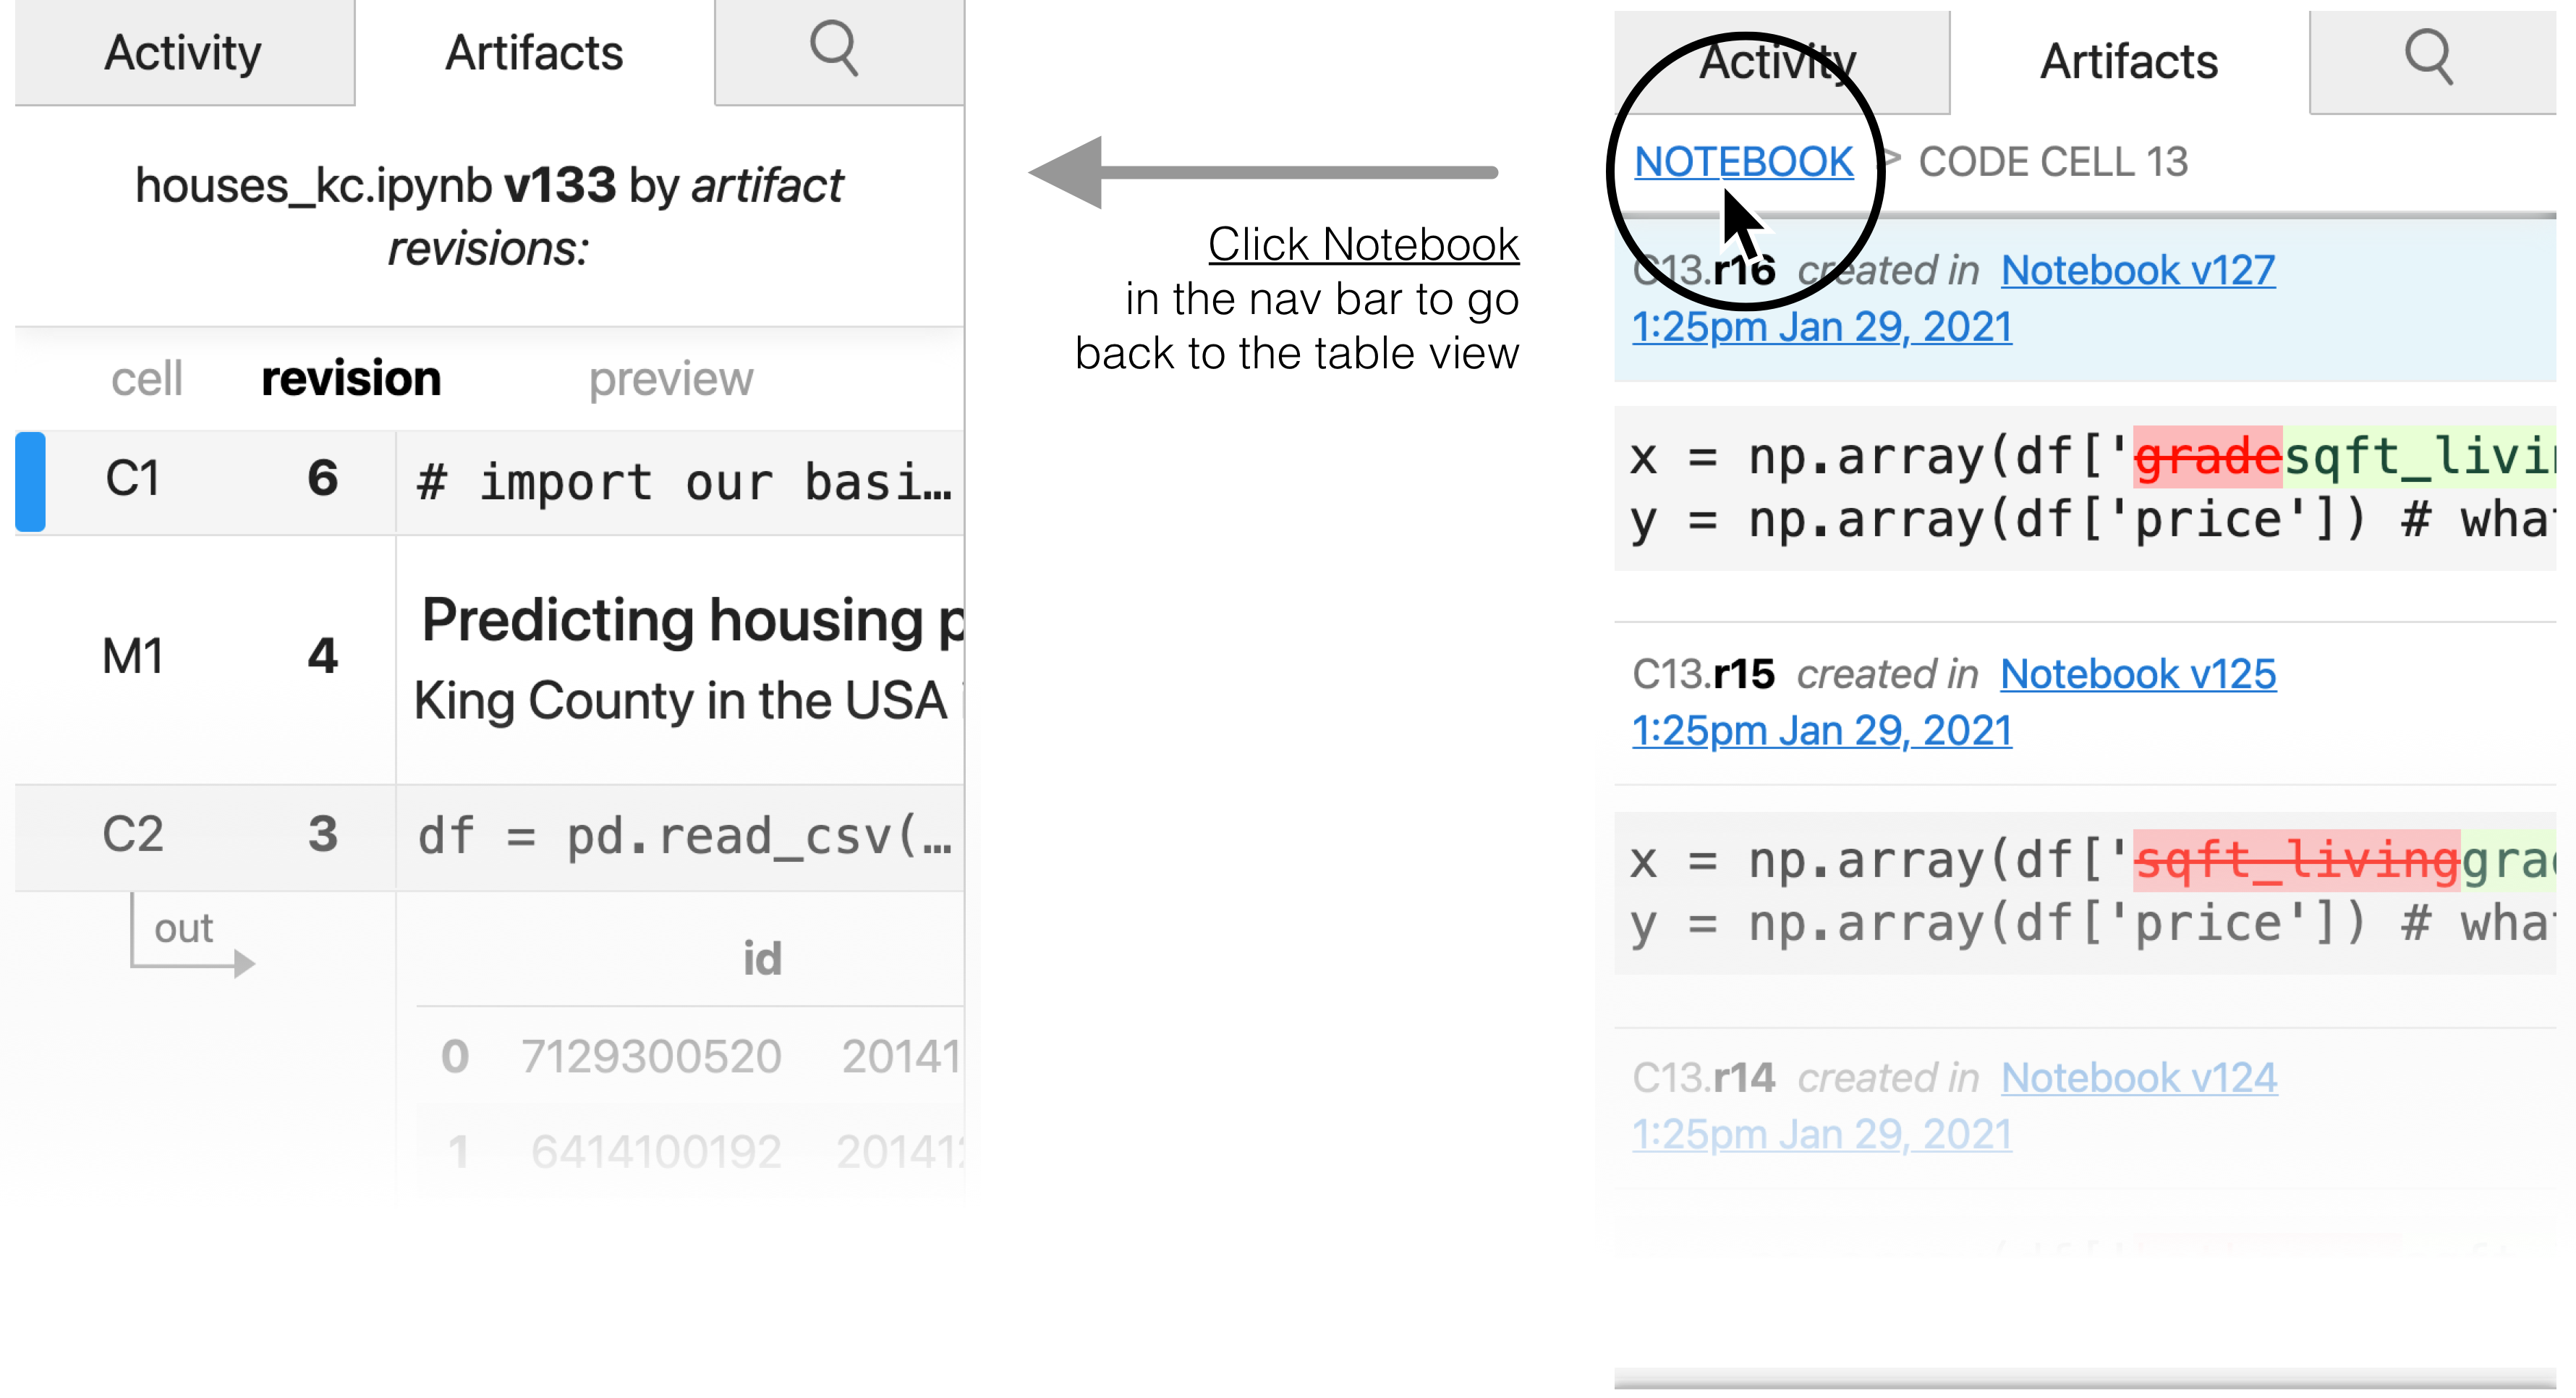
First, let's check out the table view:
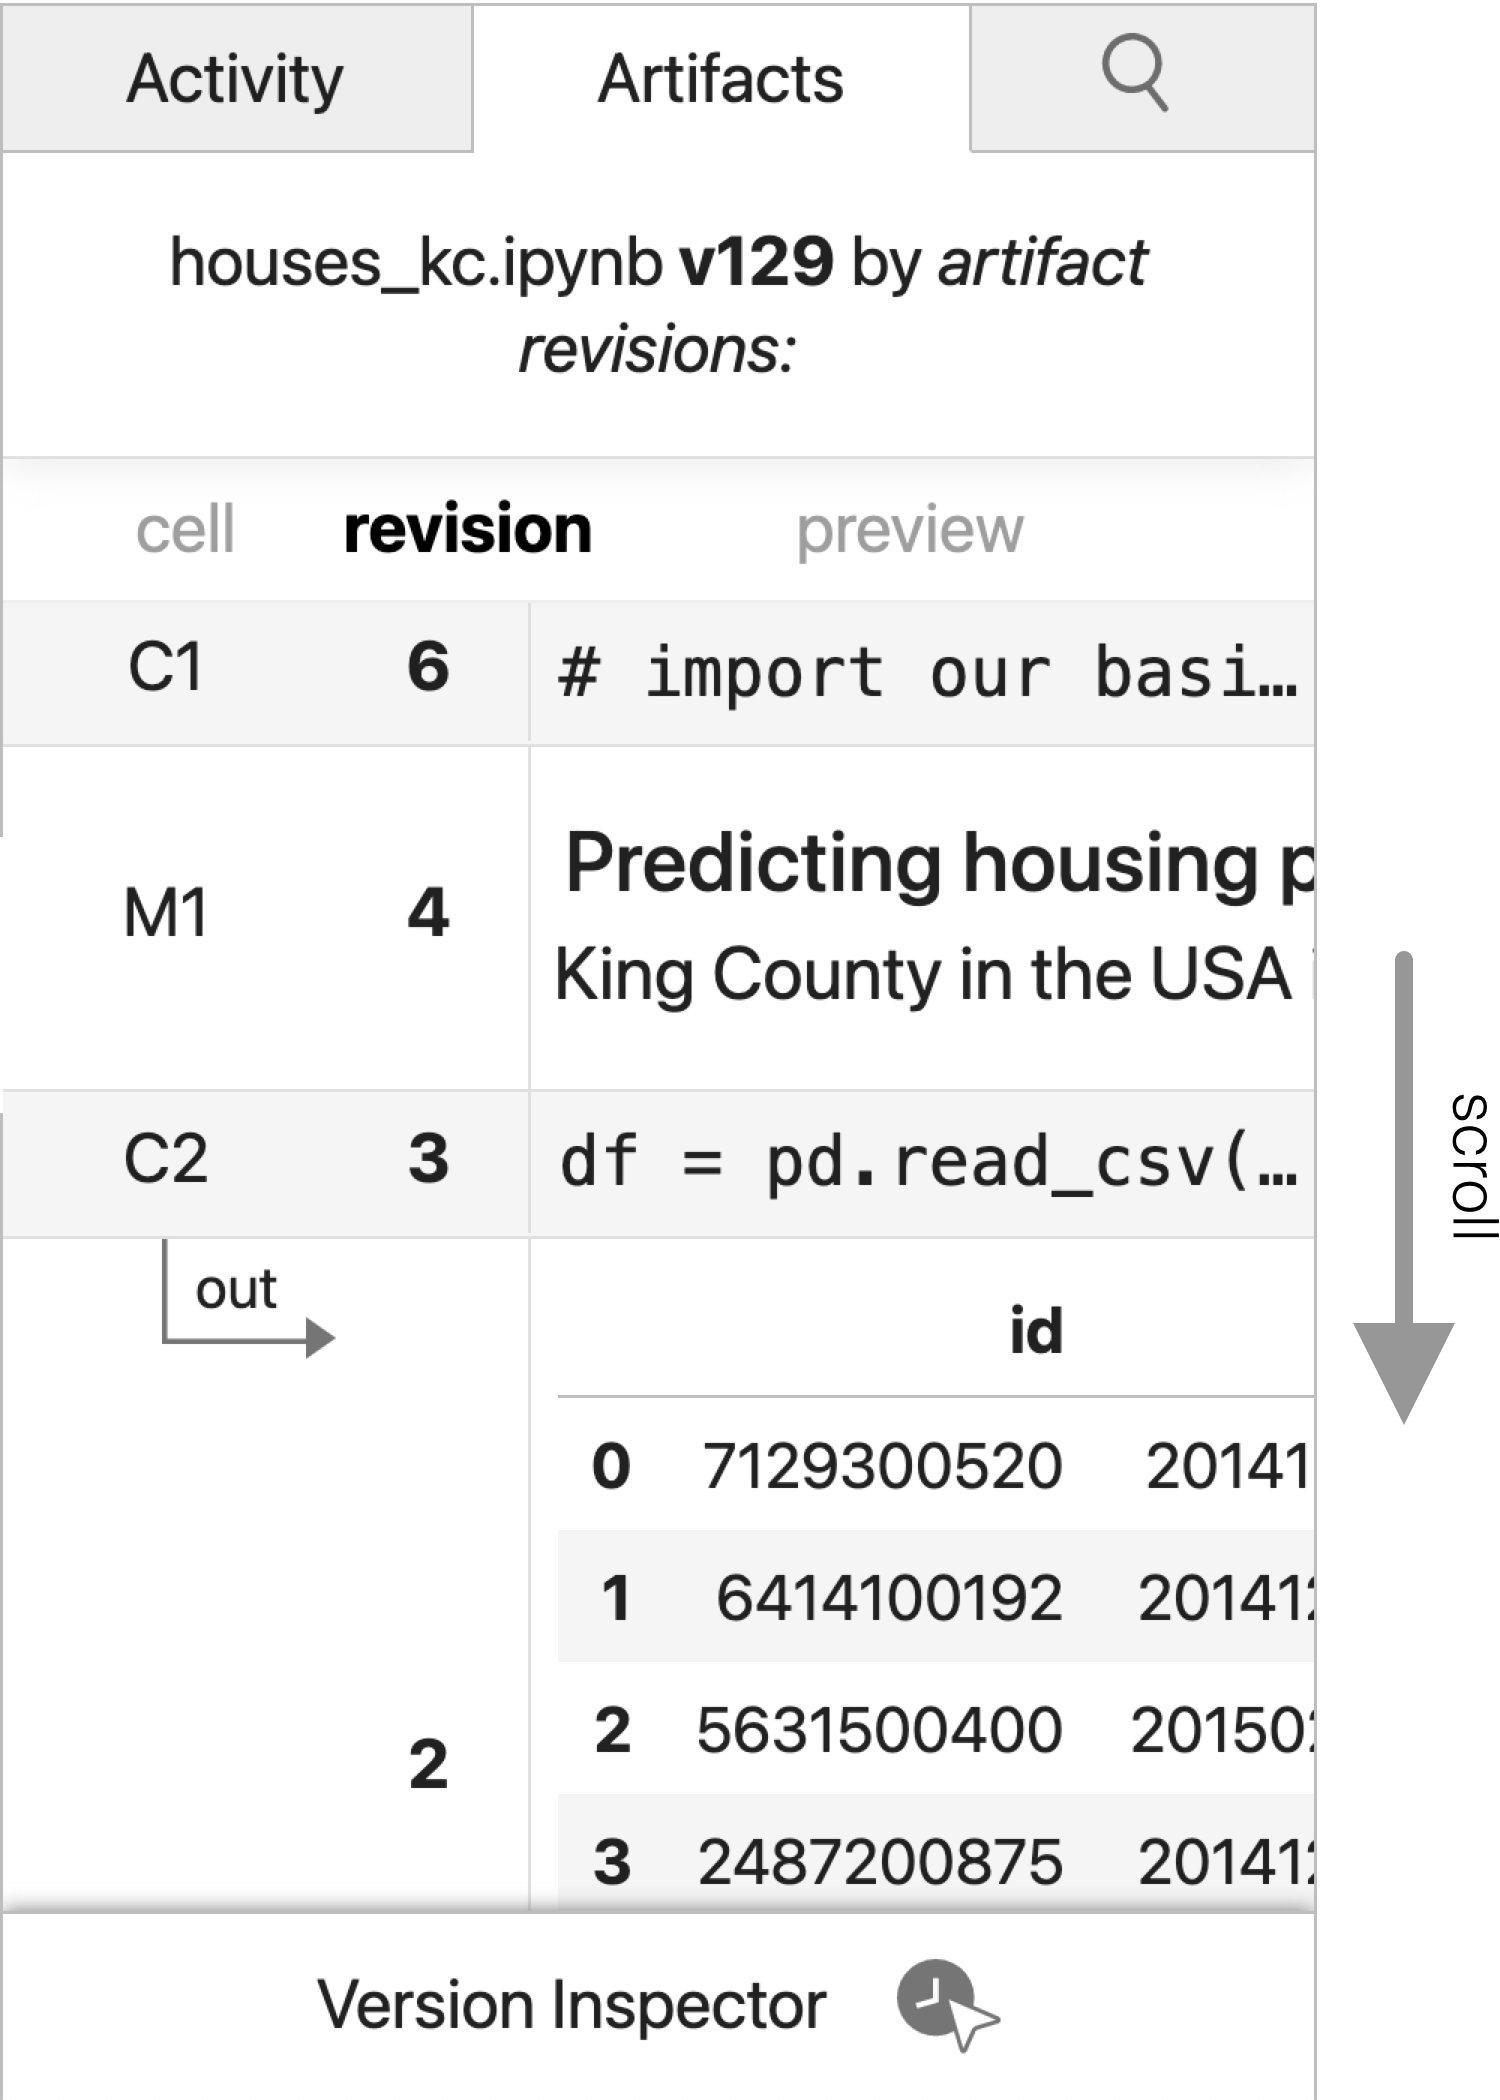
For each cell & output in your current notebook, this table lists how many versions exist of that cell. Cells are abbreviated C for code and M for markdown. Each cell has a number that identifies it, like C2. This id is unique, permanent, and never changes, so that you can always recover a specific cell even after it's been deleted.
Question: How many versions exist for C4 (Code Cell 4)?
11
Scroll the table down to the output of code cell 14 (C14). In the preview of this output, we can see that this cell of the notebook prints out model metrics.
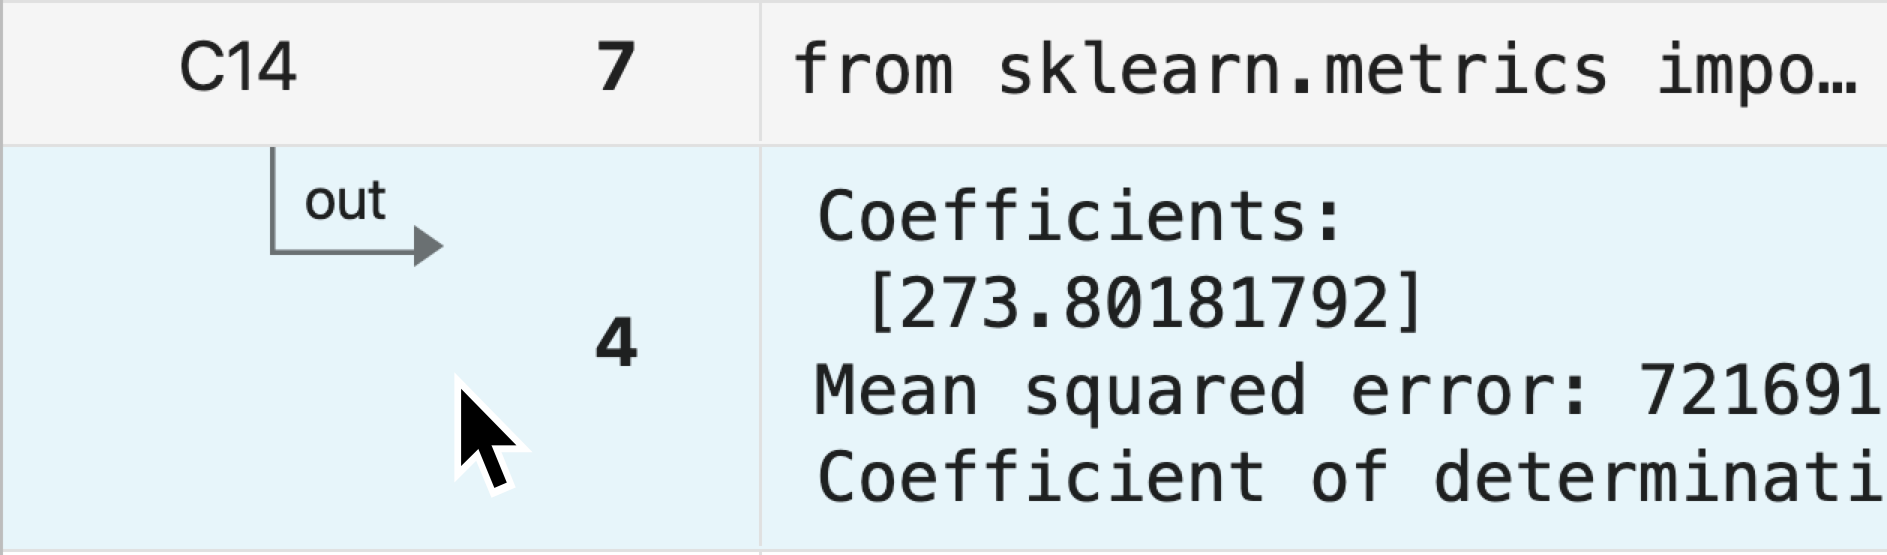
Click on the output to see all of its versions:
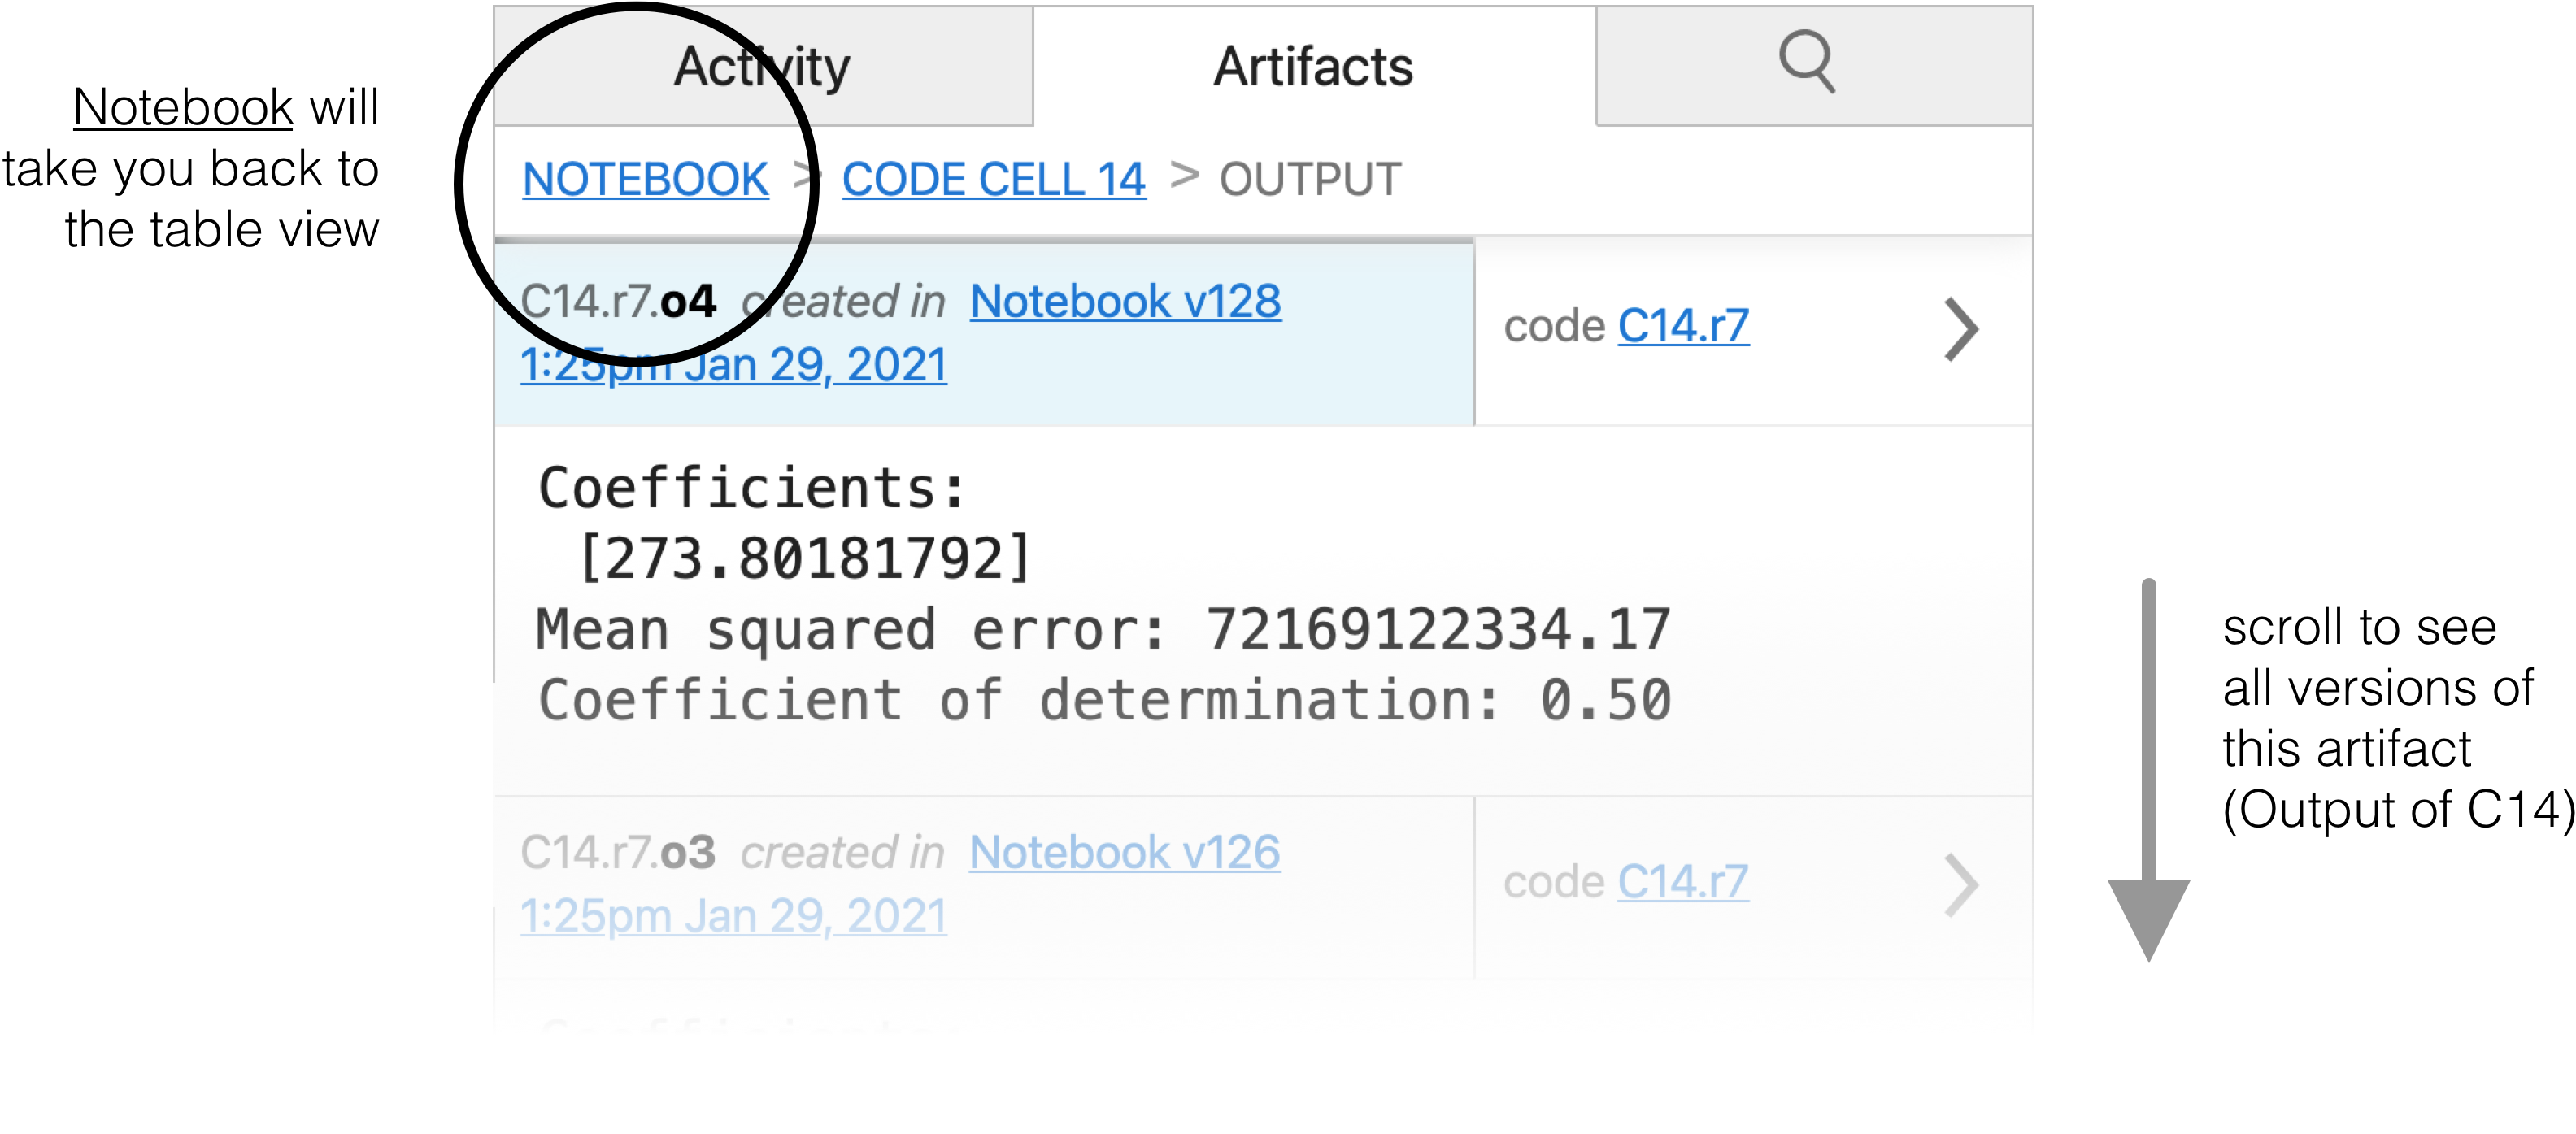
Welcome to the detail view! The detail view will show you every version that has ever been created of a specific thing. While in this view, clicking on a link like Notebook v128 will open up the ghost notebook to help you see a specific version in context of the full notebook version.
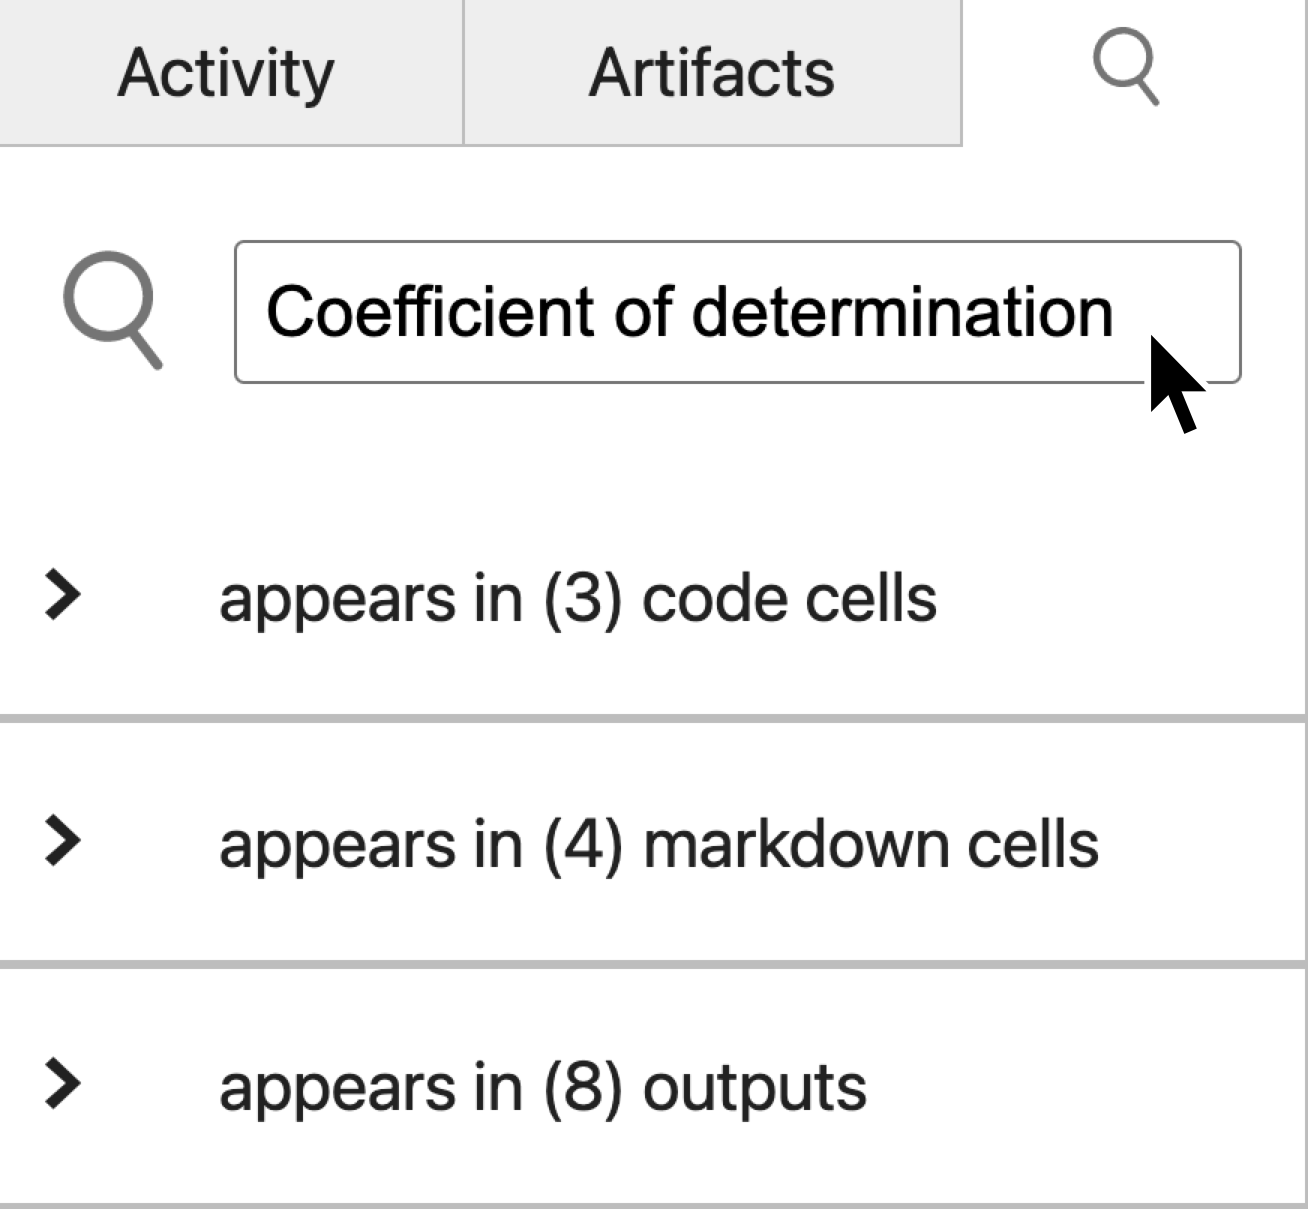
Question: Using the detail view for the
output of code cell 14, what was the lowest value of
Coefficient of determination the author got?
0.29
Now, taking a look at the current Jupyter notebook, we can see that the author actually has two different models in their notebook. Next let's take a look at the history of metrics for the second model.
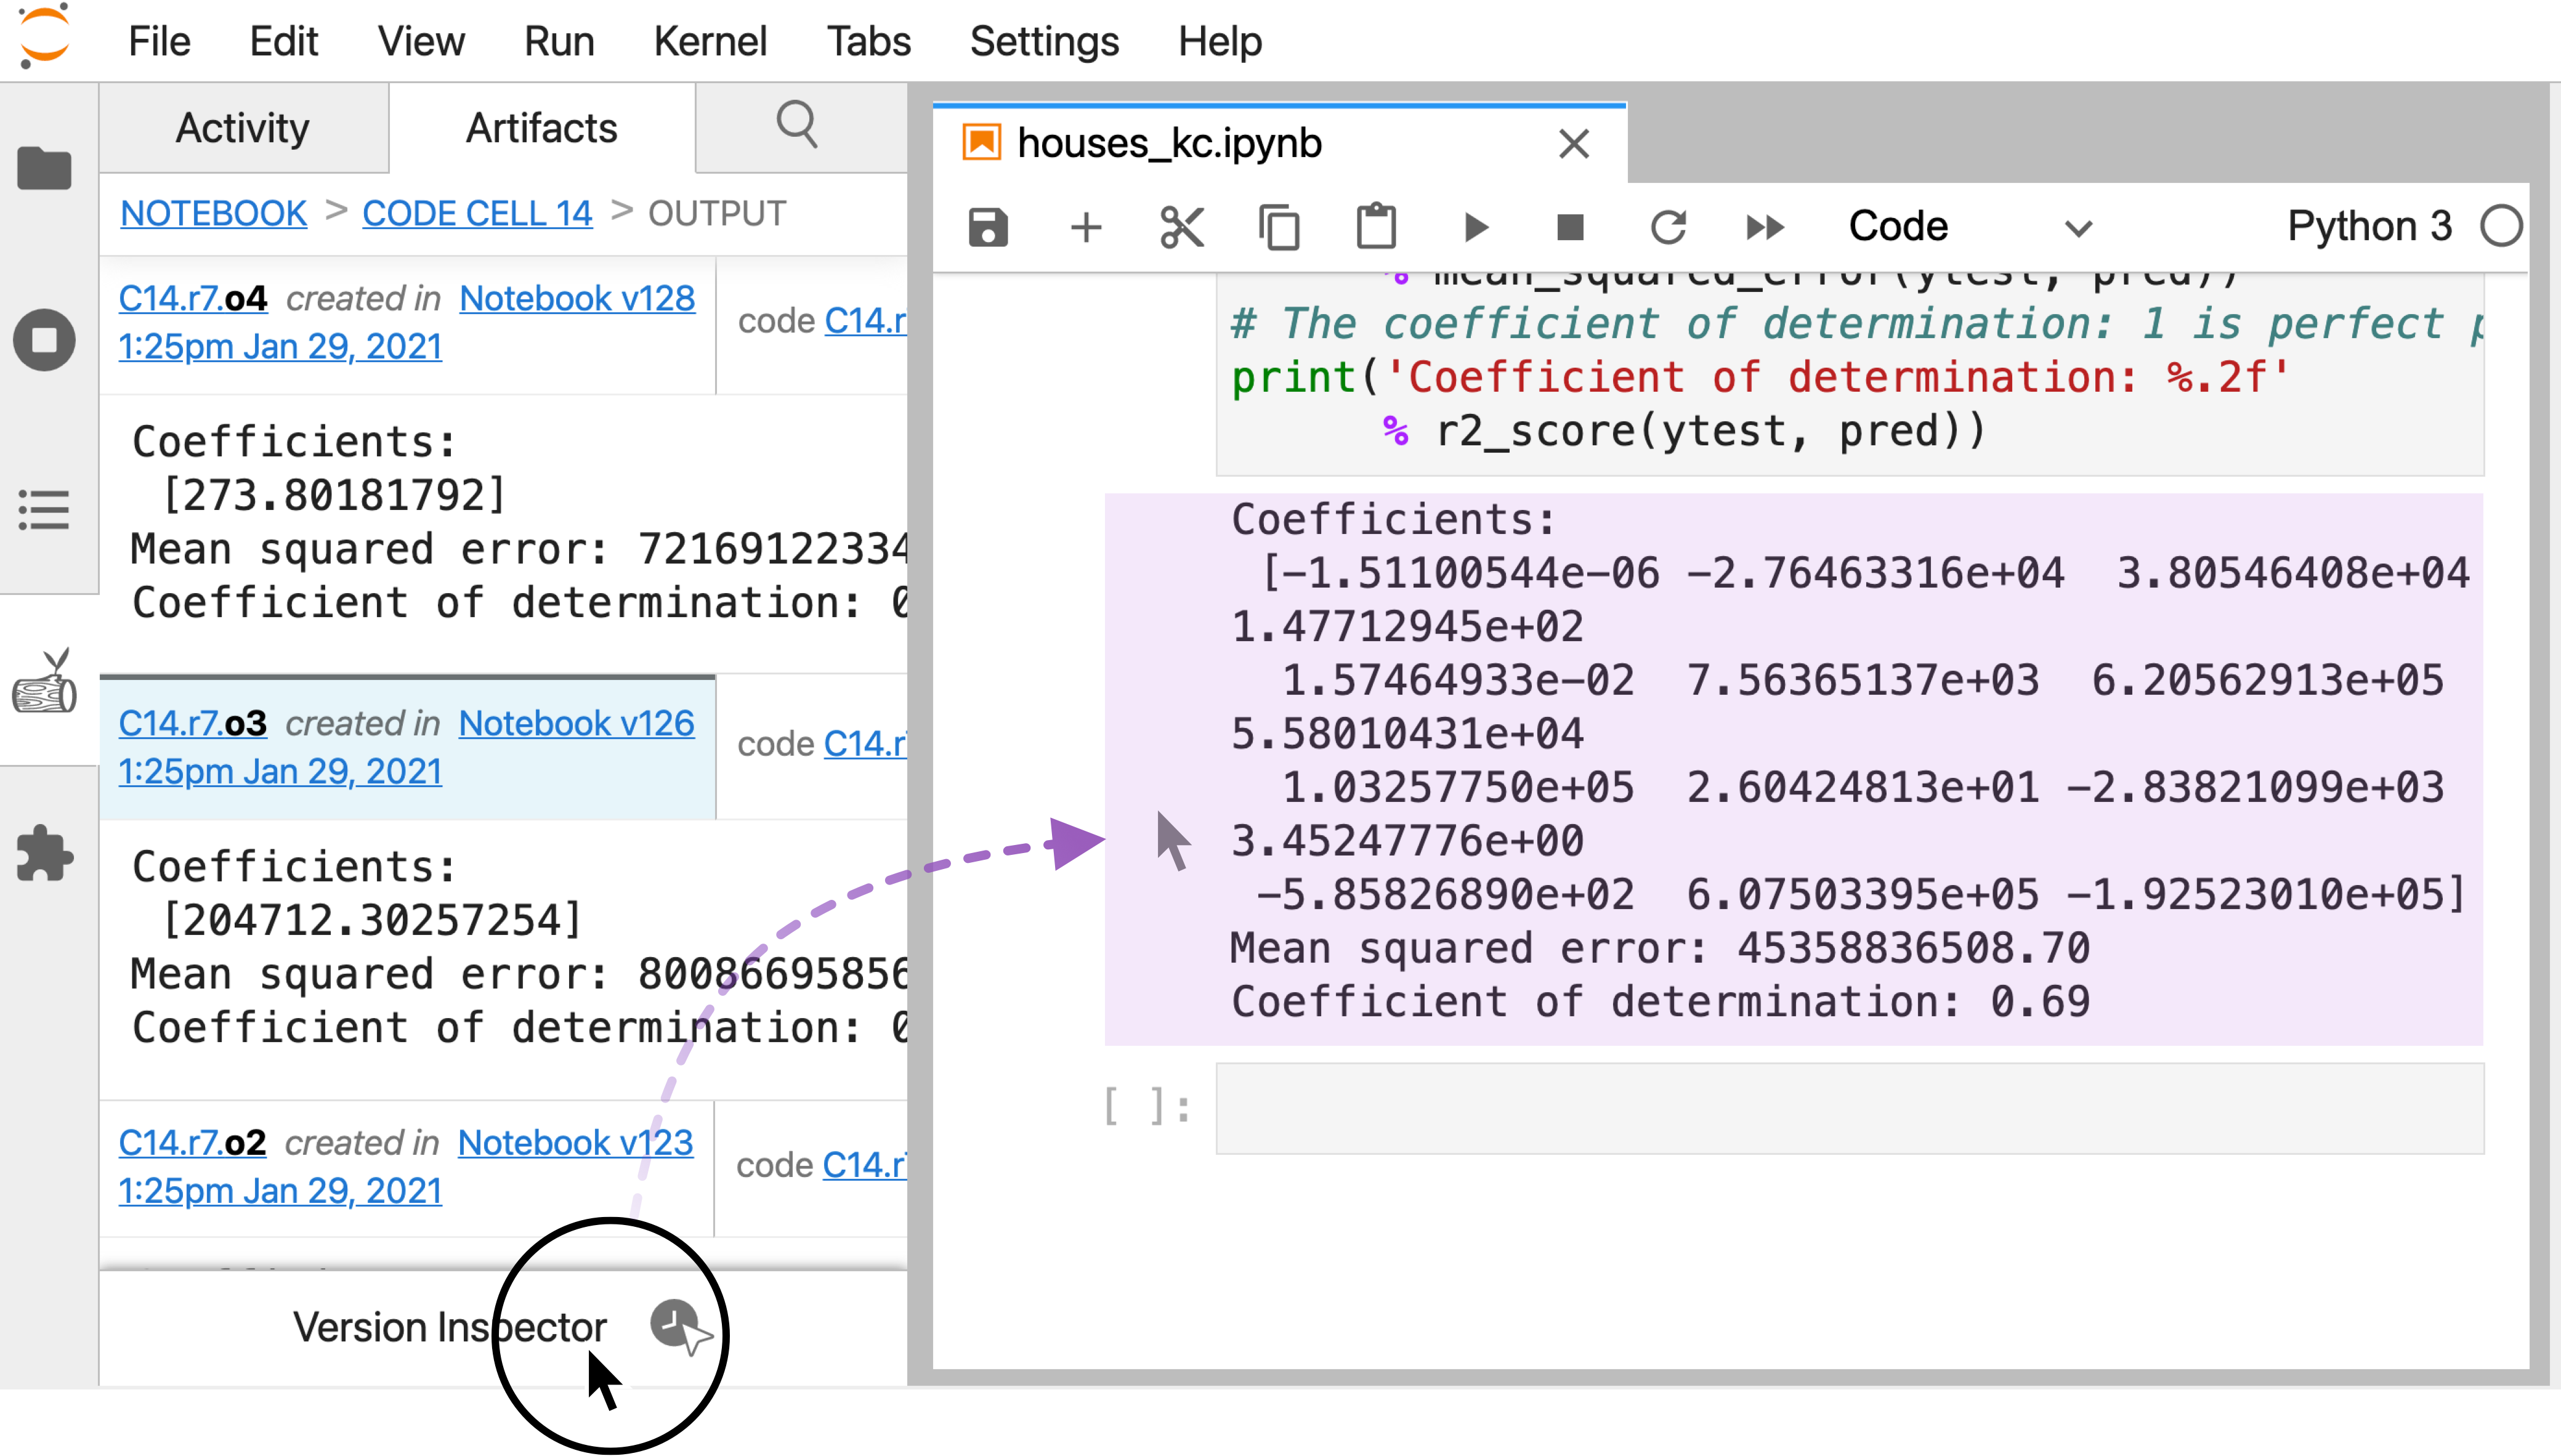
A different way of finding history in Verdant is to use the version inspector.
Click on the Version Inspector button to activate the inspector. Then click on the final output in the current notebook to see its history. With the inspector, you can get the history of anything from the current notebook just by clicking on it. After using the inspector to click on the last output of the notebook, you should now be seeing metrics of the output of code cell 22:

Question: Using the detail view for the
output of code cell 22, what was the highest value of
Coefficient of determination the author got?
0.69
Finally, sometimes you'll want to retrieve the history of a cell or output that was deleted i.e. it no longer exists in the current Jupyter notebook. To find history of anything by keyword, including the history of previously deleted cells, use the history search tab of Verdant:
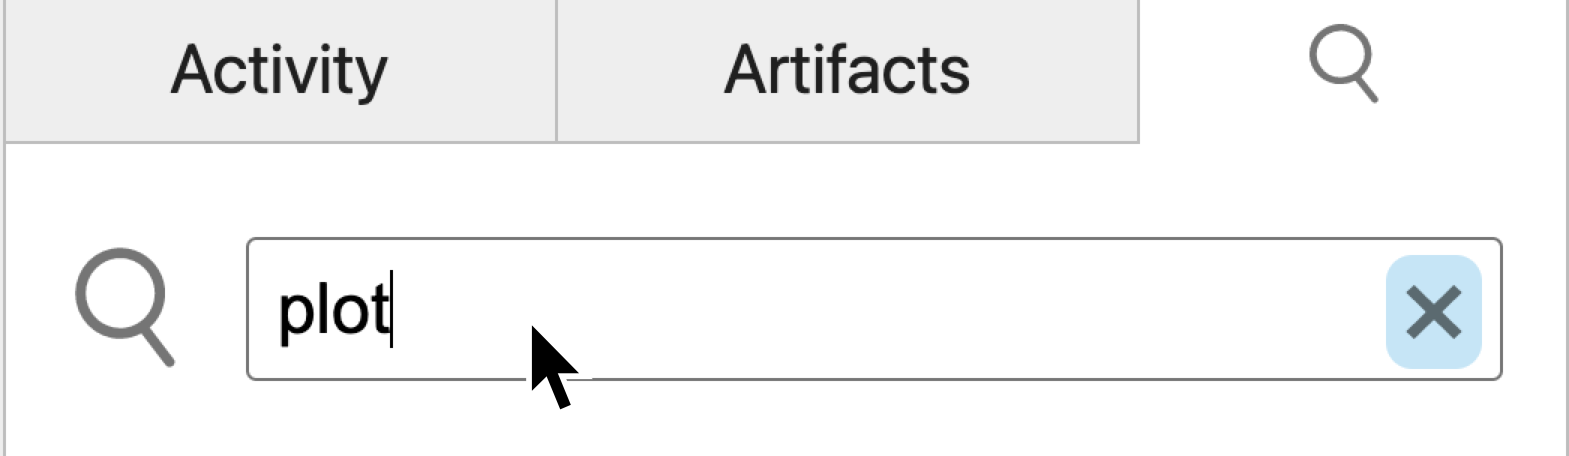
3. Finding images, charts & visualizations
A few ending words on how to find charts and images in history. The history search has a few special keywords, such that if you search for "plot" or "image" or "chart", the search will return all images a notebook has ever produced:
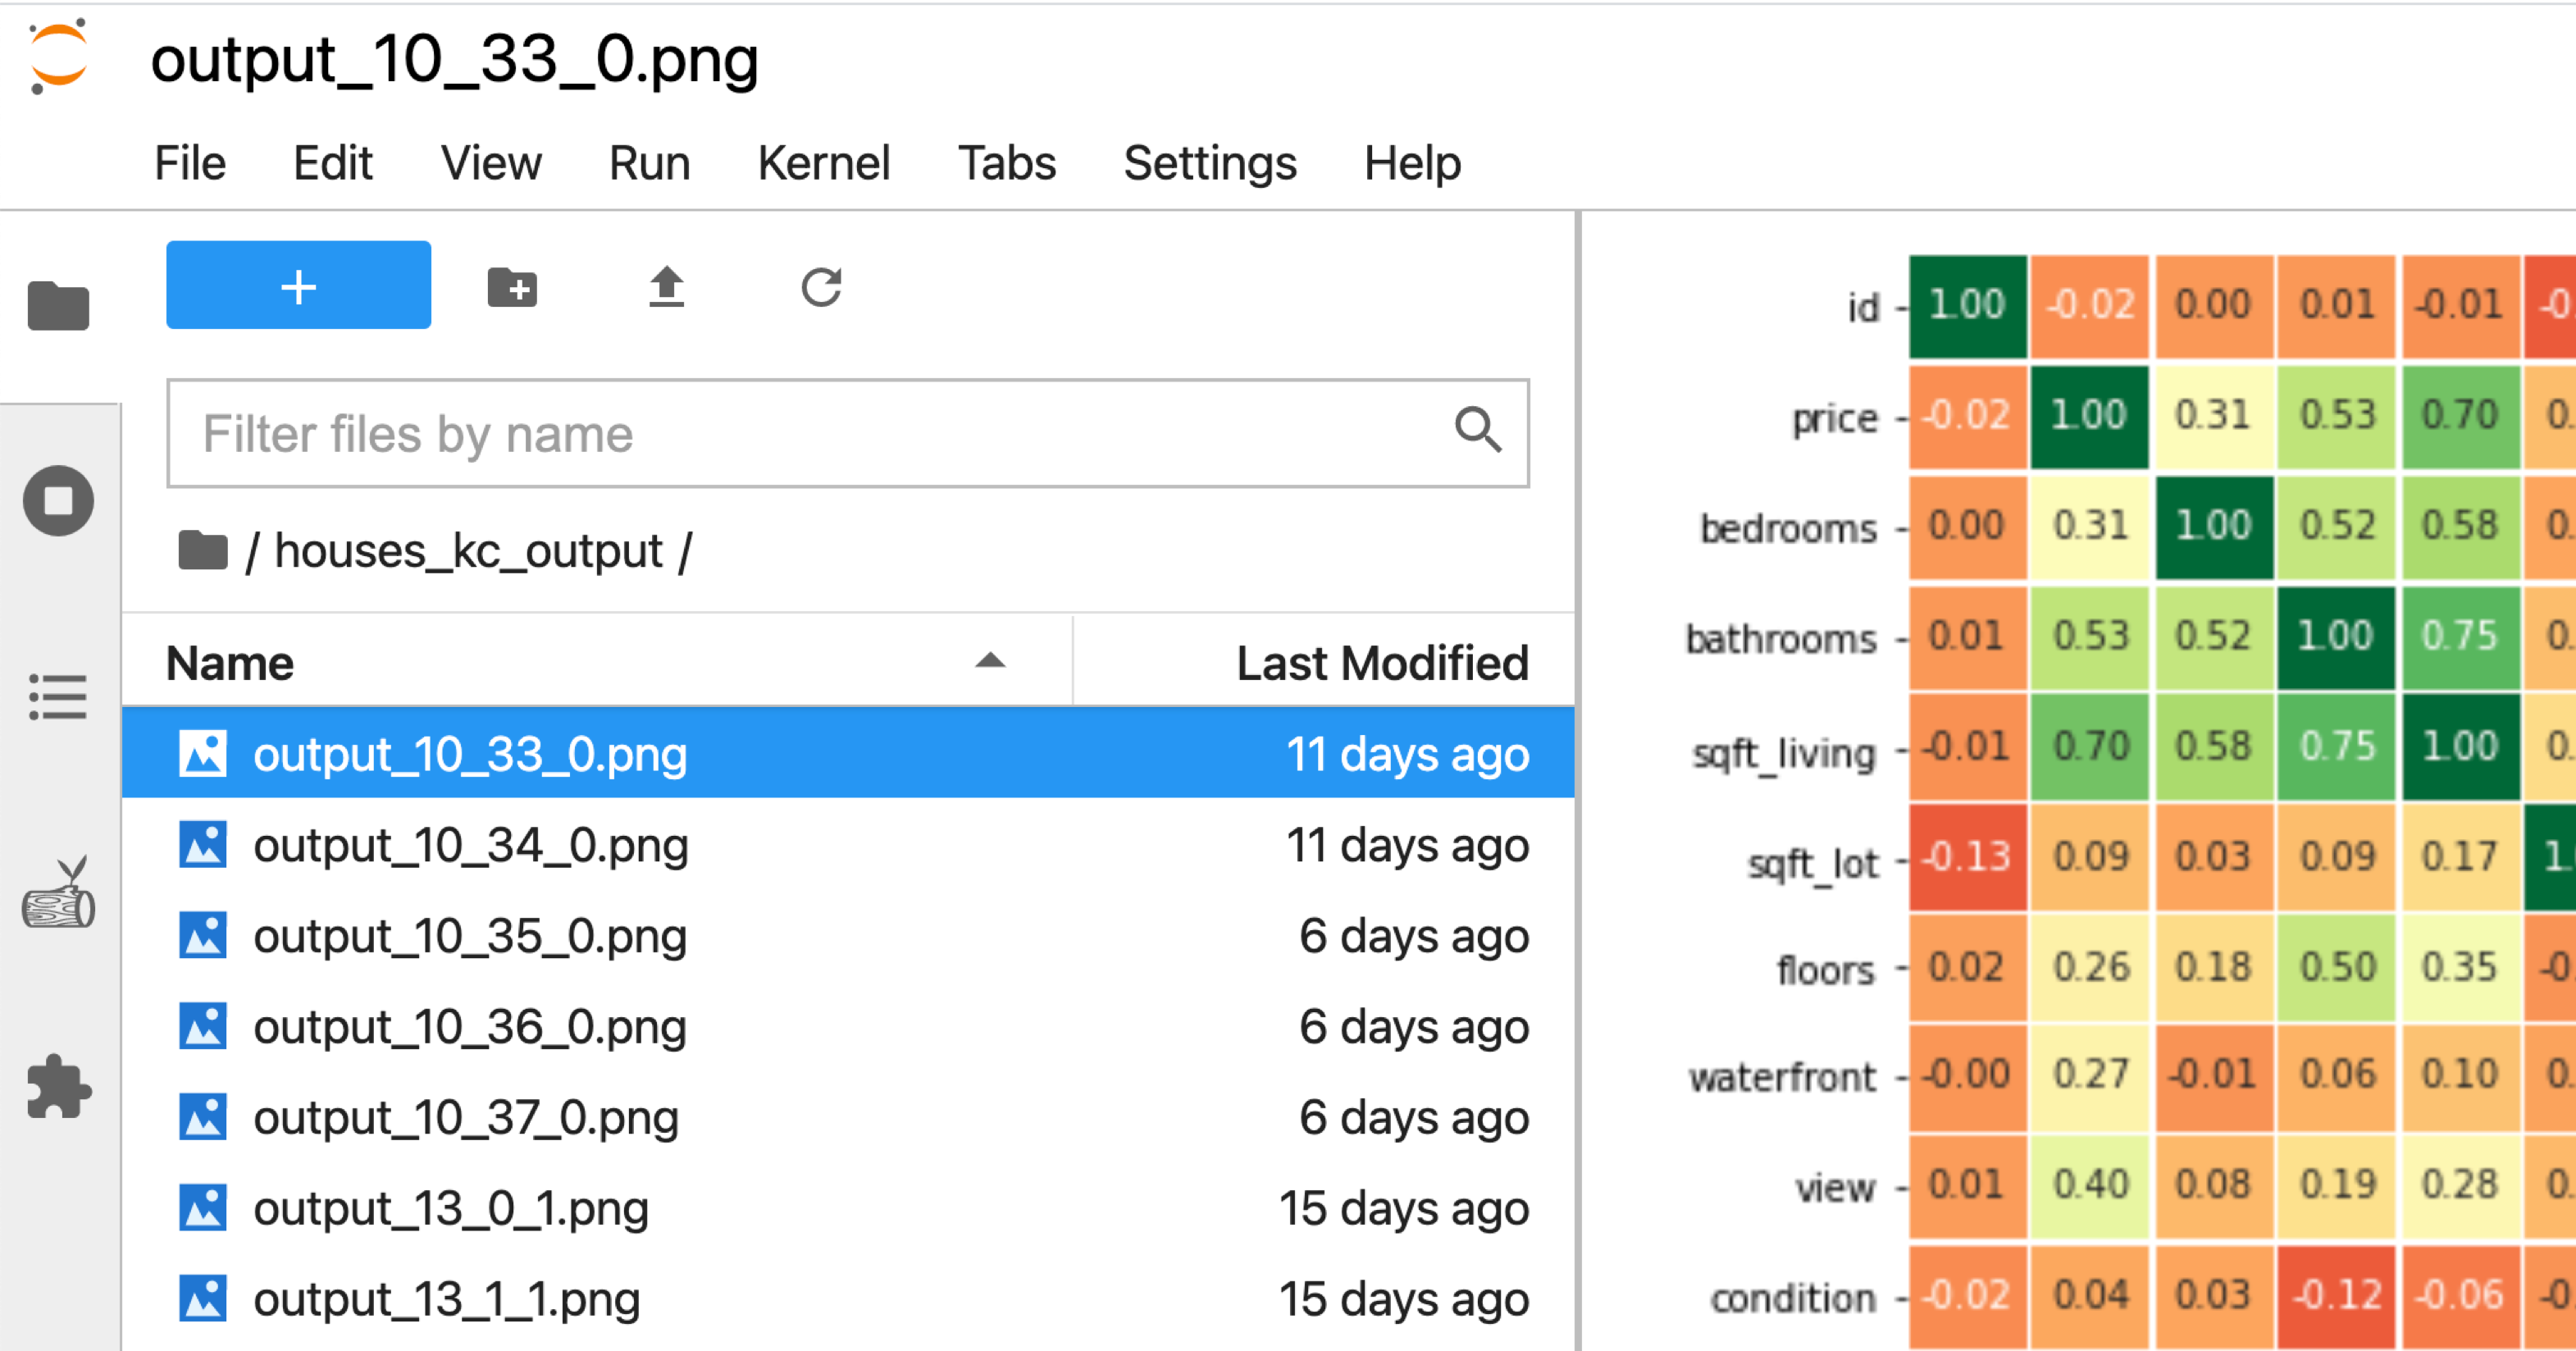
Verdant actually stores all images a notebook produces in a
auto-generated folder titled {name of your notebook}_output such as
houses_kc_output. Open that folder in your normal
computer file browser to see all the images. If you decide to delete
images stored in this folder they will just show up with a missing
image symbol in Verdant:

Meanwhile if you want to reproduce an image you find in the output folder, simply copy the name of the file (shown below in JupyterLab's file browser):
Be sure to type = before the name to let the history search know you're searching for an exact artifact by name:
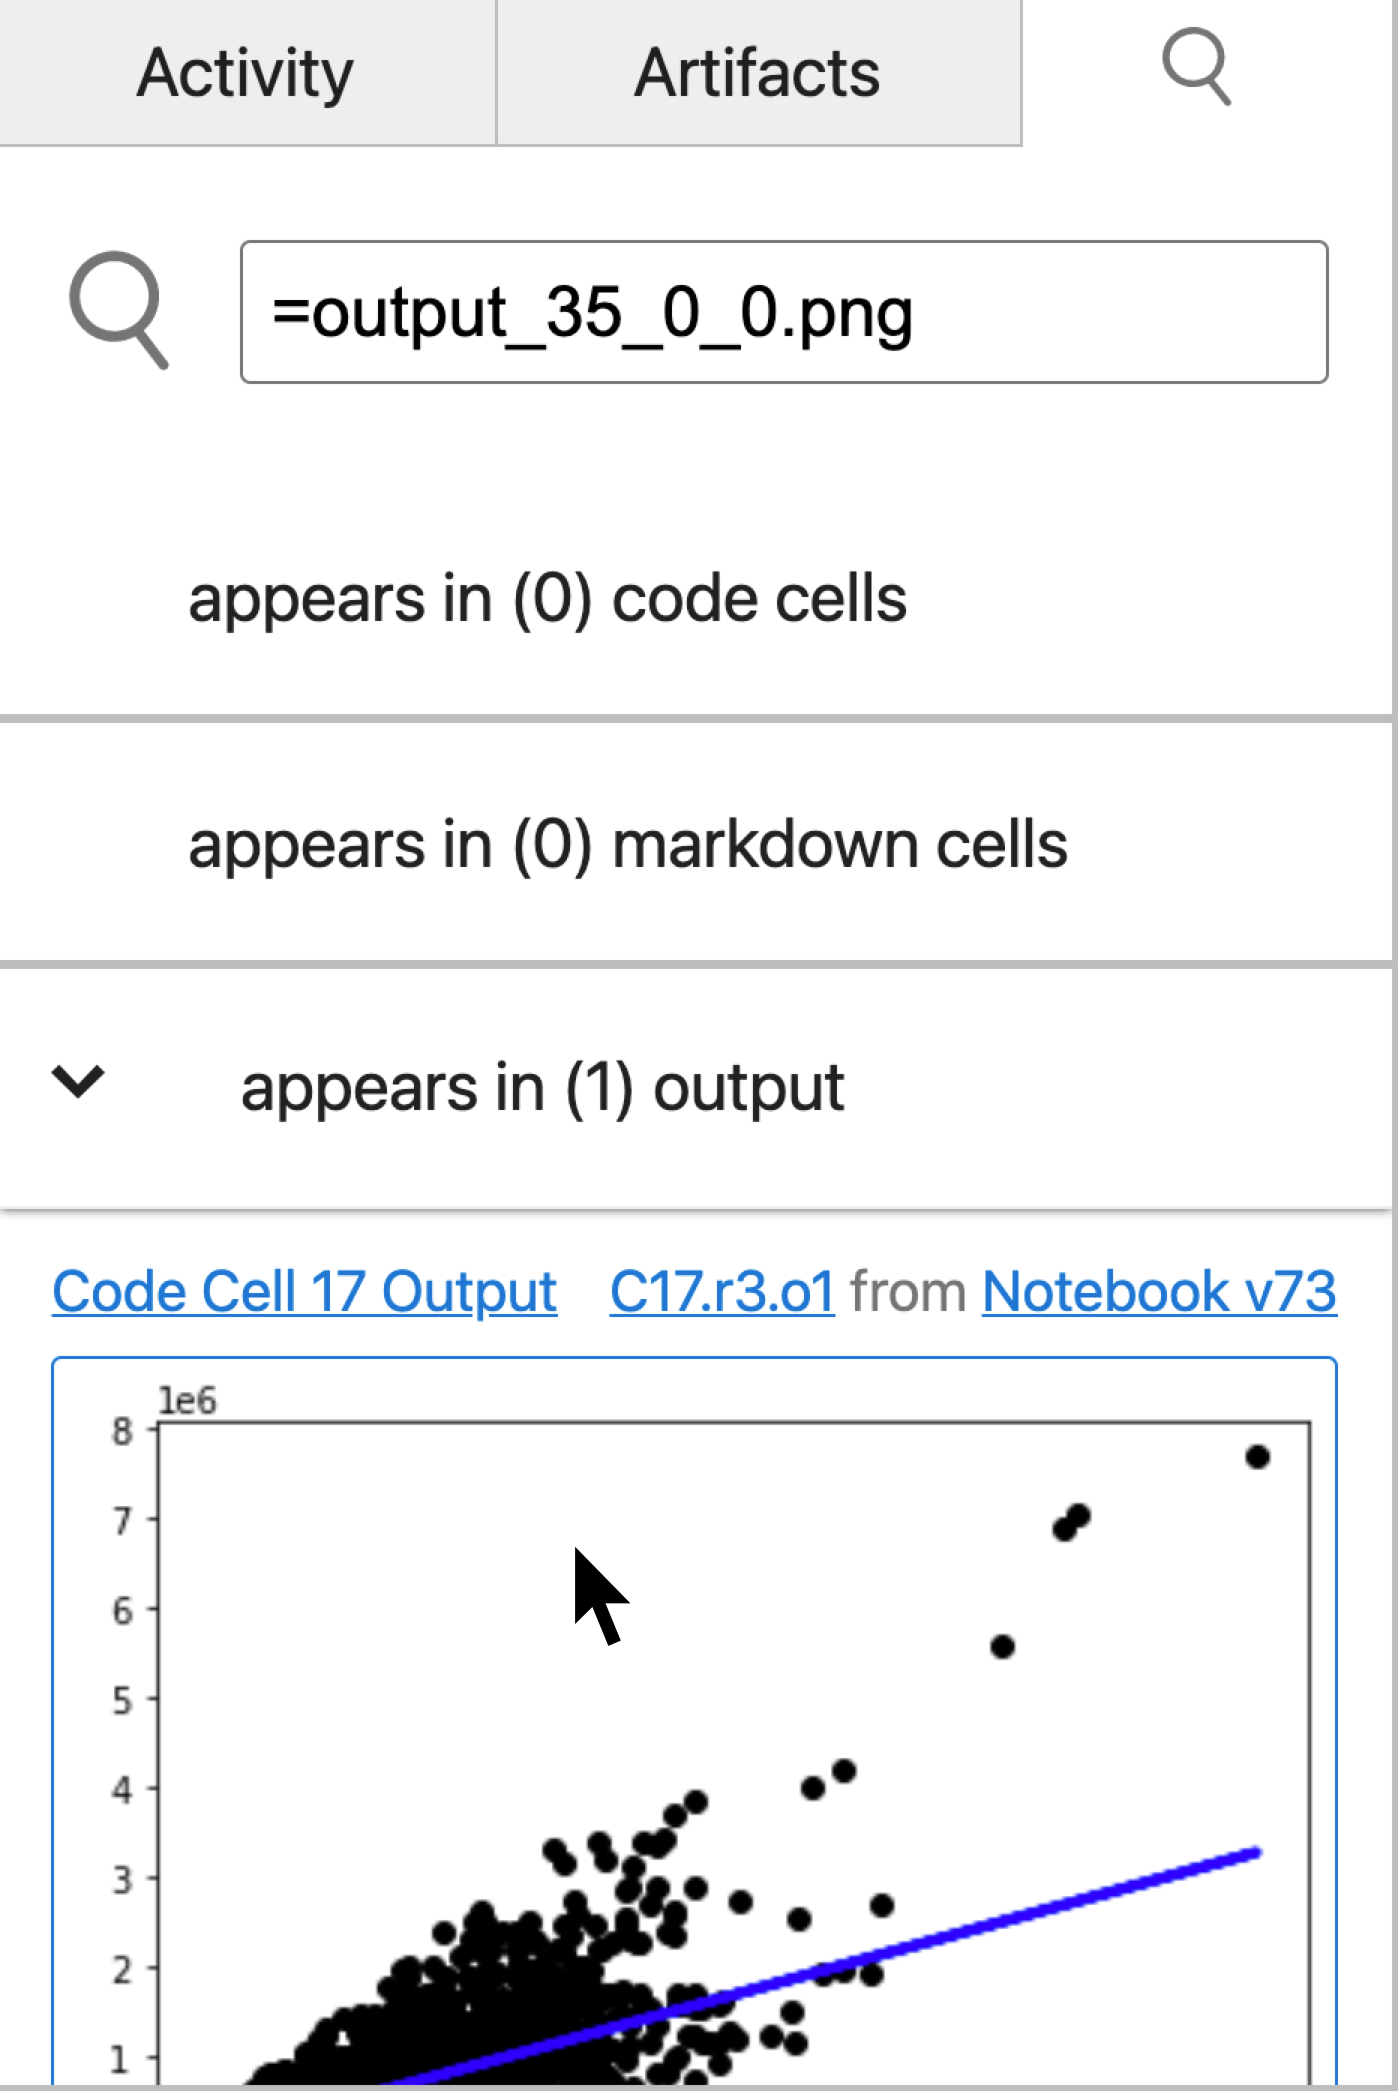
Question: One final question to put it all together. How many versions of code cell 17's output exist?
6
You did it. Happy coding! If you encounter any issues with Verdant, we always appreciate feedback or a issue report in the repo. Many thanks from our team at Carnegie Mellon University. <3